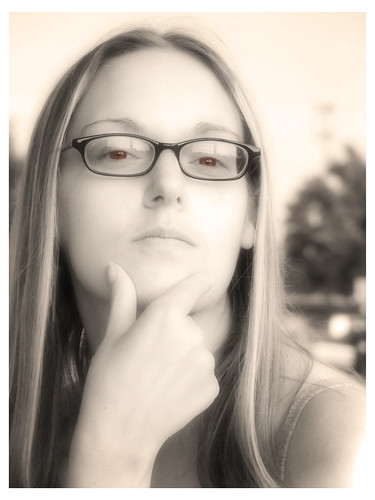
The XZ-1, like most Olympus cameras of the level at least above their typical point-and-shoots, features on its mode dial a special little mode called "ART". I've tooled with it before, mainly the dramatic tone setting which brings out very stark, HDR-like image quality that can honestly either make or break any given scene. There are other settings in this particular mode as well - diorama, which gives a very misaligned tilt-shift look to things, high contrast black and white which literally permits each pixel of the image to be either black or white with no in-between (it works a charm in high-ISO situations, for sure), pinhole which looks as its name describes, all of which are certainly neat, not necessarily all particularly useful. One setting, however, I've developed something of an affinity for when doing my random candid snap shooting while sitting up at the coffee house bored to tears - portrait mode.
Unfortunately, when in an ART mode, most settings are handled automatically, allowing very little control over aperture and ISO and shutter speed, the trinity of essentials. Most fortunately, however, Olympus programmed the portrait mode to function much in the manner I would set it myself, maintaining the lowest possible aperture to best limited depth-of-field and handling the colors in just the warming way I would have treated them in post anyway. Then, to up the effect, the digital equivalent of a softening filter is applied to the resultant image, smoothing over all the harsh details better than I was ever able to achieve with a diffuse filter back when I was shooting weddings. The JPG results are truly beautiful, but seeing as I can't leave well enough alone, I have a tendency to apply my own little touch to the resultant images and much to my surprise find the files very receptive to the effects I apply.
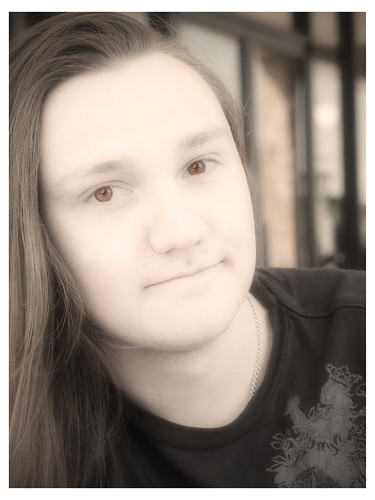
Some time ago I stumbled upon a fun manner of producing very clean black and white portraits with digital. Whereas the use of a red filter while shooting in black and white did leave a person's face brighter than most of what surrounded it, the details in the skin were all typically still there. With digital, however, and especially with the way bayer matrices feature far more green photosites than red, the application of a red filter in post did something magical for faces. The blemishes, discolorations and little things like freckles vanished under the digital filter. Even better, when the adjustment layer saw its opacity reduced to allow some measure of color through, the face managed to retain the much cleaner appearance sought after with high level portraiture.
It only came to reason that I should try the tactic on a portrait shot in the appropriate ART mode. The results were glowing, quite literally. In-camera softening of the JPGs already smoothed over the fine details in the skin, the addition of the digital red filter completely eliminated them. Any extra clarity afforded by the RAW was not missed given the sharpness retained in the details that mattered. Having been a RAW guy for so long, it was so nice to find a mode on the camera that eliminated a good portion of the post work I would otherwise have to do the hard way.
No other point to this post, really, just a long thank you to Olympus for designing an extra set of modes that prove incredibly useful to people photographers.


No comments:
Post a Comment